What are the side effects of hypromellose in vitamins?
What Are the Side Effects of Hypromellose in Vitamins? When purchasing vitamins or dietary supplements, more and more consumers are paying attention to the
When it comes to tile installation, many people focus on the tiles themselves — their design, texture, or color. But there’s one hidden hero that truly determines how long your tiles will last: the consistency of the tile adhesive.
If the adhesive is too runny, the tiles may slide down or form hollow spots underneath. If it’s too thick, it becomes hard to spread evenly, and the tiles might not stick properly. So, how do you find that “just right” consistency?
Let’s walk through what it means, why it matters, and how to get it right for different types of tiles and projects.
Think of tile adhesive like peanut butter for your tiles — it needs to spread smoothly, hold firmly, and fill every gap.
Getting the right consistency is not just about how it feels in the bucket. It directly affects:
Simply put: the right consistency means strong adhesion, smooth application, and long-lasting results.
There’s no single “perfect” thickness for all adhesives. It depends on three main factors — the mixing ratio, the type of tile, and the working environment.
Tile adhesive is usually supplied as a dry powder that needs to be mixed with water. The water amount is the key factor that controls consistency.
A good rule of thumb is to follow the manufacturer’s guide — most adhesives need about 15–20% water by weight.
💡 Tip: Always measure the water. Don’t guess! Even a small difference can change the texture completely.
Tiles have different levels of water absorption, which affects how the adhesive behaves.
These tiles soak up water quickly, so the adhesive should be slightly thicker. This prevents it from drying too fast and losing grip.
These tiles hardly absorb water. A slightly thinner adhesive helps fill in small gaps on the tile’s back and ensures full contact.
Because they’re heavier, the adhesive should be thicker and more stable to prevent the tiles from sliding or sagging after placement.
How and where you install tiles also makes a difference.
A thicker, paste-like adhesive is better. It holds the tiles in place without dripping or sliding.
A smoother, slightly softer mix spreads more easily, allowing the adhesive to cover the surface evenly.
When the wall or floor isn’t perfectly flat, the adhesive should be a bit thicker to fill the gaps and level the area.
You don’t need fancy tools — your eyes and hands are enough! Here are a few simple checks:
After mixing, the adhesive should look smooth and creamy — no dry powder, no water on top, and no lumps.
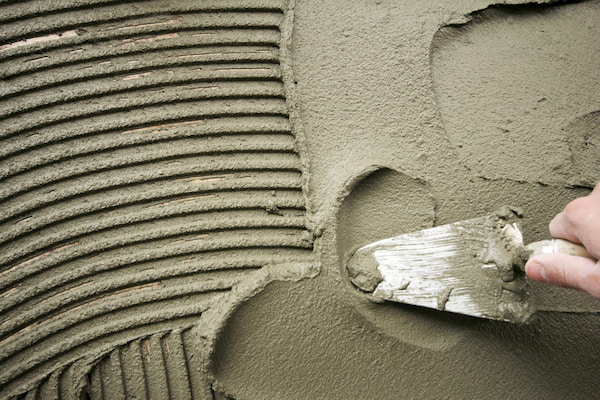
When you tilt the bucket slightly, the adhesive shouldn’t run or collapse. It should stay in place like a soft paste.
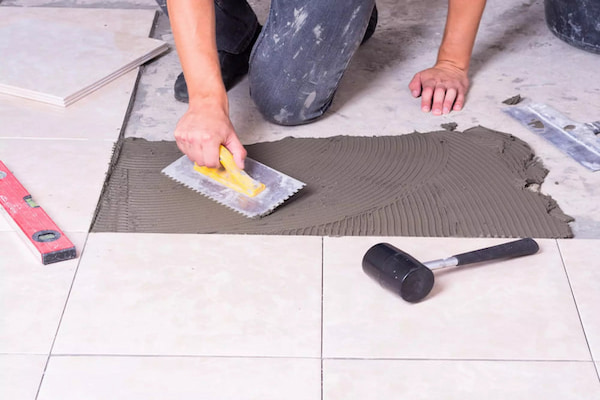
Scoop some adhesive with a trowel. It should stick firmly to the trowel without dripping.
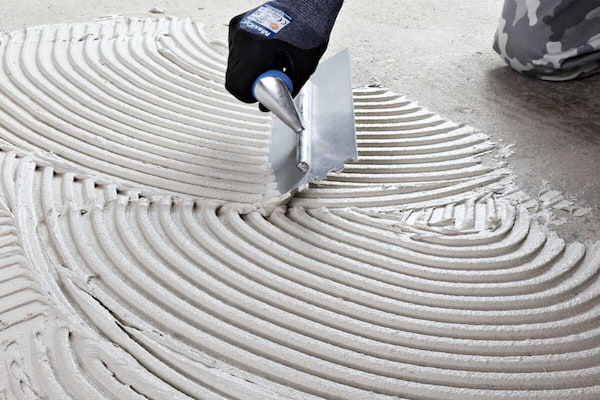
When spread on the surface, it should form clear ridges with a notched trowel — not flattening or breaking apart.
If your adhesive passes these three tests, congratulations — you’ve found the right consistency!
Even small mistakes in mixing can lead to big problems later. Here’s what happens when the mix is off:
Too runny:
The adhesive slides down the wall, making tiles shift out of place. It may also cause hollow spots under tiles that lead to cracking or detachment over time.
Too thick:
It becomes hard to spread evenly, and the tiles may not bond fully to the surface. Over time, this can lead to weak spots or even tile detachment.
Getting the balance right at the beginning saves time, effort, and repair costs later.
Even if you follow the instructions, sometimes the adhesive still feels off — maybe because of temperature, humidity, or mixing speed. Here’s how to fix it safely:
If it’s too runny:
Don’t dump in more powder all at once — it will clump. Add small portions (a handful each time) and stir slowly until it thickens evenly.
If it’s too thick:
Don’t pour in too much water in one go. Use a small cup or spray bottle to add water gradually, mixing in between until the texture becomes smooth and workable again.
💡 Pro Tip: Use an electric mixer at low speed and always add powder into water, not the other way around. This avoids lumps and ensures a creamy mix.
Rest the mix before using:
After mixing, let it sit for 5–10 minutes, then stir again. This allows the ingredients to fully absorb water and reach stable consistency.
Use within 1–2 hours:
Tile adhesive doesn’t stay fresh forever. The longer it sits, the thicker and less sticky it becomes. Always prepare only what you can use within 1–2 hours.
Don’t try to “revive” old adhesive:
Once the mix starts drying or forming a crust, it has already begun setting. Adding water won’t help — it actually weakens the bonding strength. Always mix a fresh batch.
Good tile adhesive isn’t just about the right mix — it’s also about the right ingredients. Three common additives play a key role in improving performance:
RDP (Redispersible Polymer Powder): Enhances bonding strength and flexibility, helping tiles stay firmly attached even under stress or temperature changes.
HPMC (Hydroxypropyl Methyl Cellulose): Improves water retention and workability, giving smoother spreading and longer open time so tiles can be adjusted easily.
HEMC (Hydroxyethyl Methyl Cellulose): Offers similar benefits to HPMC but performs better in hot or dry environments, keeping the adhesive stable and easy to apply.
Together, these additives make the adhesive stronger, smoother, and longer-lasting — ensuring tiles remain firmly in place and surfaces look flawless for years.
You can remember it easily with this rule:
When your adhesive meets these three points, you’re ready for a clean, strong, and long-lasting tile installation.
The consistency of tile adhesive is not about how thick or thin it looks — it’s about balance. The right mix gives you smooth application, strong bonding, and worry-free results for years to come.
So next time you’re mixing tile adhesive, take a moment to test, adjust, and perfect it. Because in tile work, consistency is everything.
MIKEM is a global manufacturer and supplier of specialty chemical products. We are committed to becoming your preferred partner in specialty chemicals with our competitive product portfolio, strong R&D capabilities, and professional formulation expertise .
What Are the Side Effects of Hypromellose in Vitamins? When purchasing vitamins or dietary supplements, more and more consumers are paying attention to the